Stop it!

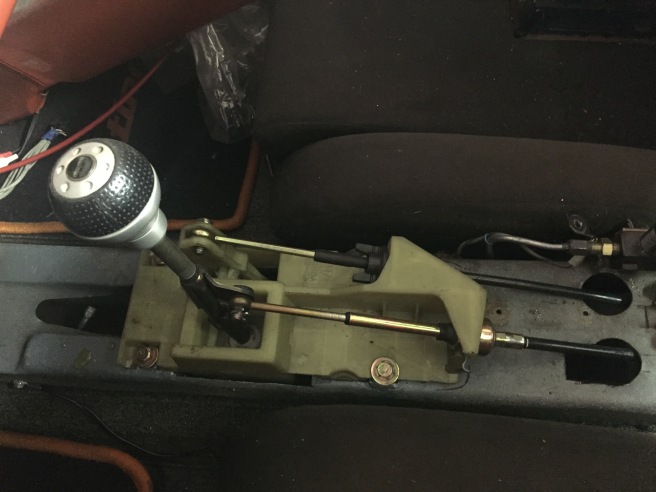
Brakes – one of the major weak points of the Scorpion.  Power brakes on the front wheels only (where there is no weight), what were they thinking !?!  Plus 9″ diameter non-vented rotors are totally inadequate for any significant horsepower boost.  I was previously running 10″ vented rotors from a 2nd series Toyota MR2 Turbo at all 4 corners with reasonably good results, even at demanding tracks like Laguna Seca.  For better pedal feel and adjustability, I’ve swapped out the original brake & clutch pedal assemblies with a Tilton pedal assembly, featuring dual master cylinders and a balance bar which allows front/rear brake proportioning.

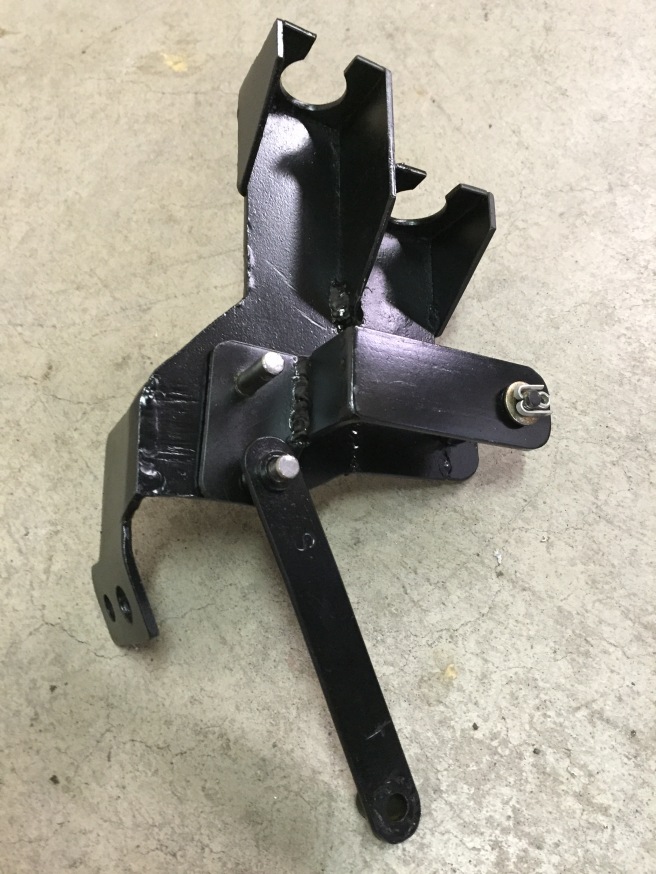
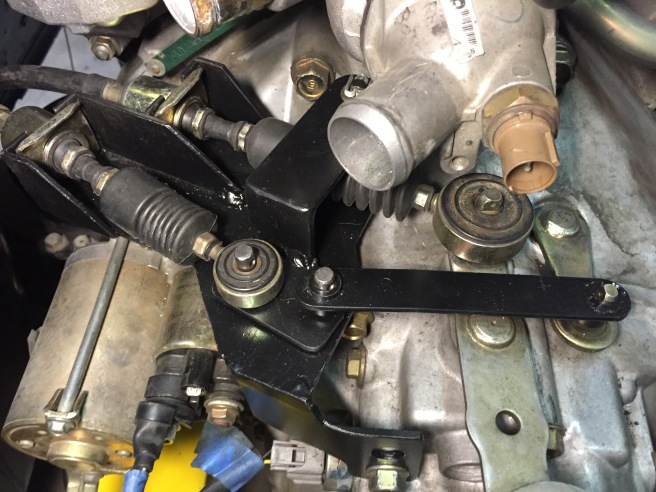
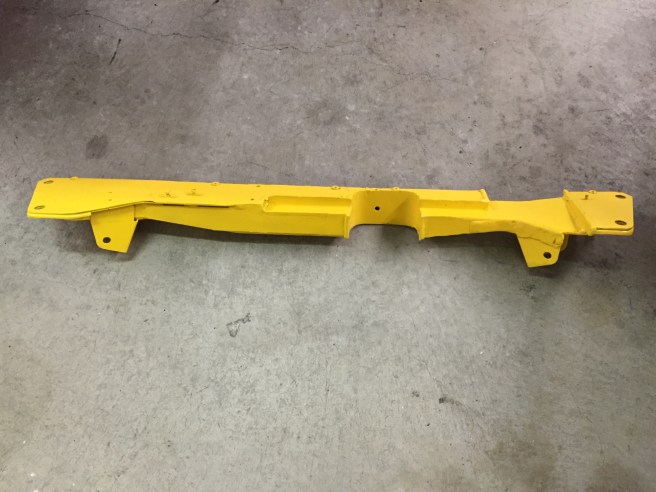
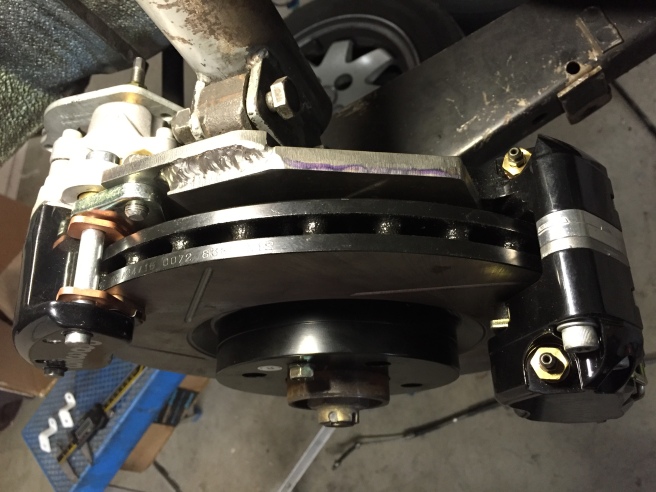
To further improve heat capacity and control, I started a search for uprated rotors and calipers.  As an educated guess, I bought a Stoptech front rotor for  a current generation FIAT 500 Abarth, and found that it fits the Scorpion hub perfectly!  I will be using these (11.1″ directionally vented) at all 4 corners, along with Wilwood 4-pot calipers (rear-heavy cars like the Scorpion can take advantage of large brakes at the rear).  Wilwood makes a small mechanically operated parking brake caliper, which solves one of the problems when fitting racing brakes on a car that sees street duty.  I had to add a spacer to the parking brake since it was designed for a slightly thinner rotor.  The rear caliper bracket is shown below.


012

September 2016 update:

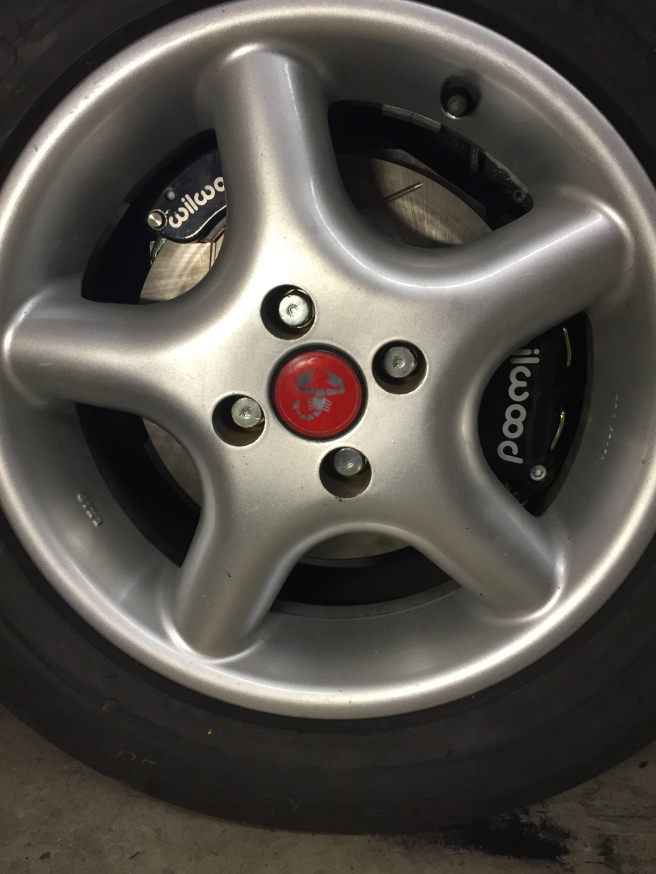
Shopping for 16″ & 17″ wheels to fit the new brakes, and not finding anything I like so far.  Is is just me, or are new wheels all over-the-top complicated?  I want something that complements the Scorpion styling and isn’t trying to steal all the thunder.  Plus, a wheel that can be cleaned in minutes, not 10’s of minutes or more.  Just for fun, I mounted my 15″ Exip track wheels on the car, and was amazed to find that they fit!  The clearance to the wheel weights is almost nothing, but that’s solvable.  Here they are:

img_7824

Fuel Tank

I prefer the tank in its original location to preserve trunk space, but the V6 engine interferes with the tank.  You’ll notice that there’s a fair amount of empty space between the side of the tank and the inner wall of the side of the car, so my solution was to cut the lower outer corner off the tank and slide it over a couple of inches to that it sits over the frame rail.  Capacity is reduced by about a gallon or so, not a big deal for me.

IMG_6895

TIG welding is recommended to minimize the chance of leaks.  I also coated the inside of the tank with gas tank sealant, which will also help protect the tank from rusting.  Fuel tank mounting is shown below:

IMG_6897

Shifter

I’m totally sold on cable shifters, as is just about every auto manufacturer in the last 10-20 years.  Shifting is precise and positive, the shifter doesn’t move around with engine torque, and space consumed is minimal.  I cut down the stock Acura shifter mechanism to fit the center tunnel and mounting holes that I had added for my 16V Thema Turbo project, which used a first generation Toyota MR2 mechanism.  It was much simpler to change over to the Acura unit since the cables fit the mechanism, and the l0ng shifter cable was almost exactly the right length to attach to the transaxle.

IMG_6886

The short cable is now way too short, since the cables are coming from the front rather than from behind the transaxle.  I built a simple mechanism with a link to extend the length.  The assembly below relocates the shifter cable housing attachment points, with the cables oriented at a slight angle to clear the fuel tank.

IMG_6835

Here is the mechanism bolted to the transaxle with cables in position.

IMG_6950

Exhaust

A challenge with the Scorpion is designing an exhaust system to fit in the area between the engine bay and rear bumper given tubing bend radius limits, and it’s even more difficult with a true dual exhaust.  The Acura dual exhaust is not really a dual exhaust, as both manifolds feed into a single pipe, with the rear exhaust going through a 180 degree bend before it enters the single pipe.  My design is a true dual exhaust, with 2 catalytic converters and 2 mufflers.  The benefit of my engine choice started to become evident here, as I was able to purchase stainless steel headers of decent quality with a connector pipe for the grand sum of $300!

IMG_5950

The above shows a mock-up of the final system (all stainless) before final welding.  I did fire it up and it was loud, but not excessively so.  Probably over the sound limit at Laguna Seca, though…

IMG_6118

Currently, here’s what it takes to make the engine run!  Next step is to remove the 95% of the wires that don’t have anything to do with engine operation.

Motor Mounts

The first step is positioning the engine properly within the engine bay.  I built a dolly that supports the engine at the desired height (6″ ground clearance) as an aid.  Here’s the engine on the dolly:

IMG_6815

Then it’s a matter of centering the axle CV joint flanges left-to-right, and matching the engine CV joint centerline front-to-rear to the centerline of the rear wheels.  I try to retain the original engine motor mounts where possible since they’re engineered for the particular engine.  This engine had some heavy cast iron mounts that I ditched in favor of welded steel replacements, and of course the chassis-side mounts are all custom to fit the Scorpion.  For this engine, significant crossmember reliefs were required, mostly for the front exhaust, but also various other engine components.  The resulting crossmember was substantially reinforced to compensate for all the cutouts.

IMG_6839

Fabrication of the motor mounts requires a lot of head scratching, as there are many possible options.  I tried to minimize any permanent intrusion into the engine bay, and ended up with none at all.  The process of fabricating motor mounts is a multi-step process, as measurements are difficult, and things shift as you apply the engine weight.  The mount pieces are cut up, and tack welded together, then broken and tacked up again as needed until the positions are correct and welding can be completed.

IMG_6828

The motor mounts, from left to right:

  1. Transaxle mount – I’m not sure how important this mount is, and the swap kits for dropping this engine into your Honda Civic don’t include this mount.  I’ll probably try with and without.
  2. Rear motor mount – bolts to the Scorpion bulkhead behind the engine, which I’ve already reinforced to handle the load.
  3. Passenger side mount – I welded a bracket onto the right rear fender well to attach the top of this mount, and the bottom bolts to the frame.
  4. Front mount – this attaches to the crossmember.  The bracket shown below the stock mount provides a platform at the correct height, and is removable to allow gas tank removal without removing the crossmember.  This mount is vacuum controlled via a solenoid valve, which I assume leaves the mount soft at idle and stiffer under load.

The stock front and rear mounts include shock absorbers, but I’m going to hold off on these until I see whether or not they’re really required (there’s no top “dog bone” mount).  Below are the engine compartment attachment points that I added. To create attachment points in the frame, I drilled holes and welded in nuts flush with the surface.

Here is the crossmember with rear motor mount and transaxle mount installed.

IMG_6929IMG_6919

And views below with mounts installed and the engine in place – transaxle mount, rear mount, and passenger side mount.

J32A2 Extraction

With the engine now running, I drove the car into my “shop” (2 bays of my 3 car garage).

089

With engine out, I need to make sure that 1) it still ran, and that 2) I had identified all the modules and wiring that I needed to retain.  Yes I actually did fire up the engine on this rig:

213

…and now for a test fit in the Scorpion engine bay.  Were my measurements correct?

IMG_4093IMG_4099

and yes, if fits with room to spare – nice!  The project is now officially underway.

Flashback – Thema 16V Turbo Swap

Before I get too far into the V6 project, I thought it would be of interest to outline my Scorpion’s history and describe its previous incarnation.  I bought my Scorpion in 1981 with 25k miles from the original owner in LA.  I drove it stock for a while, then bought a 2.0 liter twin cam from a Montecarlo that met an untimely end here in California.  Although rougher running and not as rev-happy, the extra torque was sure nice.  By then I was participating in track days, and was getting tired of pulling over on the straights to let faster cars go by.  Barry Waterhouse (now deceased) in the UK told me about his 8V Thema turbo conversion, and found an engine/transaxle for me.  That was fun, but it was more of a quick & dirty swap, and I wanted a better planned implementation, with a 16V that was boosted to 300 or more HP, since that sounded like a lot of fun.

I found a 16V turbo engine/trans in the US that had been brought over by a FIAT employee in Michigan, but was too slow on the trigger and ended up spending 2x to buy it from the person who moved faster.  Here’s the engine after all the updates:

16V on cart

The header is TIG welded from 321 stainless steel which feeds an oversize Garrett GT28RS ball bearing turbo with 1.2 bar wastegate into a 3″ exhaust.  Intercooler, throttle body, injectors and cams are all uprated.  The engine has forged, oil-cooled pistons, peened rods, a 3 stage dry sump oiling system, 12mm head bolts, and racing head gasket.  The flywheel was lightened, and joined with a competition clutch and pressure plate.  A programmable ECM provides engine control closed loop via a wide range O2 sensor.   The transaxle is from a Thema 8.32 (which has a Ferrari V8) to which I added a Transtad torque-sensing limited slip differential.

IMG_2898

All the above added up to 285 RWHP and 284 lb-ft  of torque as measured on the chassis dyno at 034Motorsport.  Performance exceeded my expectations, and was amazing for passing slower traffic on 2 lane back roads, but total overkill for any other street use.  It was also a great track setup, except that all the heat back there takes its toll.  The turbo alone becomes a 25 kilowatt heater at full tilt, so fair warning to those looking for the High Boost experience!

burnout_2007 no plates


Where It Starts

If you’re just tuning in, the About page gives the background on this project.  After considering many options, I opted for the Honda/Acura J32A2 V6 for my (latest) Scorpion swap.  It’s a very compact all-aluminum 60 degree V6 that I believe will fit the character of the car, with a large array of aftermarket parts available.  Yes it’s not Italian, but after living through two other Italian engine swaps, I’m looking forward to a local and extensive support structure and low cost parts.

Another reason for this engine choice is that a few versions of the engine were available with a 6 speed transaxle and limited slip differential.  I priced JDM engine/trans options, and decided that I’d be better off purchasing a whole car, which would also provide every conceivable part I might need (axles, motor mounts, wiring, and ECU, to name a few).  I found an ’03 Acura CL Type S at a salvage auction in LA, got a temporary dealers license from a broker, and a couple of days later was in LA with a trailer.

062

I got it cheaply because, in addition to front end damage, the car was advertised as “Won’t Start”.  It turned out that it wouldn’t start because the key provided was the wrong key for the car.  After removing the ignition lock and disabling the immobilizer, it started up just fine.  Aside from a broken motor mount and cracked ignitor coil, the engine appears to be fine.

063

It’s a beauty, huh?  Actually the car is pretty nice, all leather interior with every option.  My idea was to part it out on Craigslist which could have paid for the purchase price.  However after wasting way too much time dealing with CL flakes, I gave up and towed it to my local Pick-N-Pull where they insisted on giving me real money for it.  So far so good!